$45 for a PTT switch? Not when I have a 3D printer!
I recently bought a headset (Koss SB-45 on Amazon*) to use with my Xiegu G90 radio, and the Heil AD-1ICM adapter to hook it to the radio. But still needed a PTT switch to make it work. I was looking at the Heil one and to me it just looked super clunky. And for $45! Can’t be more than a couple bucks in parts. So I set out to make my own. Let’s get started…
I had to buy just a couple things…
| Qty Needed | Part Name | Price |
|---|---|---|
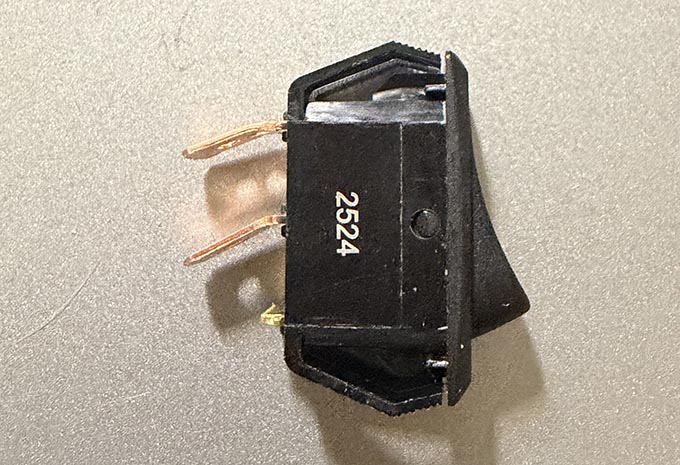
| 1 | Normally off, momentary SPST switch (pack of 2)* | $8.99 |
| 1 | 1/4″ Mono Audio plug (pack of 2)* | $5.79 |
And I had some of it on hand…
- 18 gauge Red/Black silicone wire* (you can use whatever you have on hand)
- 2 female spade connectors*
- Adhesive lined heat-shrink tubing*
- 60/40 rosin core Solder*
- Grey/Black PETG 3D printer filament*
- M3x8mm button head screws*
And finally a couple tools…
- Weller WES-51 solder station
- Wire stripper/crimper
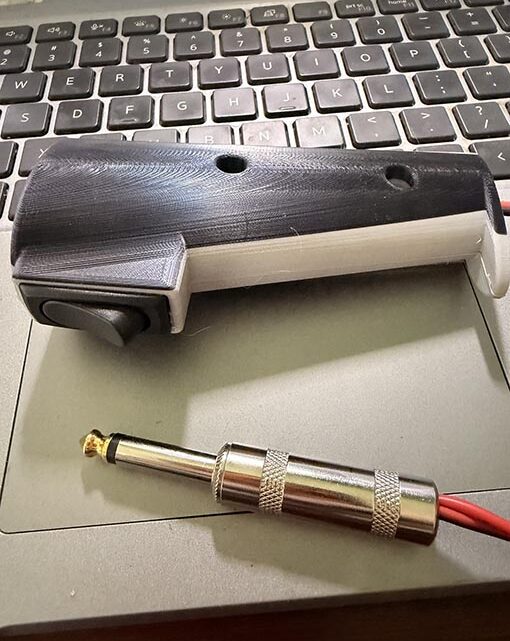
Not too bad of a list, so I set about to design a case that would fit the PTT switch, the wire with spade connectors, and would fit comfortably in my hand. After a few variations and test prints I settled on this version.
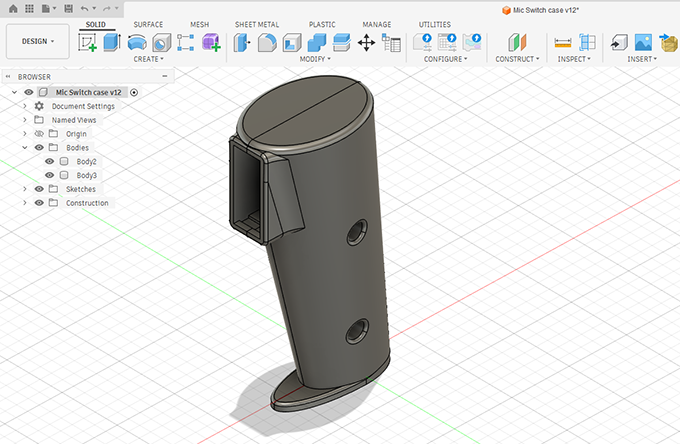
It fits comfortably in my hand, and works with the switch and M3 screws I already had on hand. The STL files are available for download on Thingiverse.
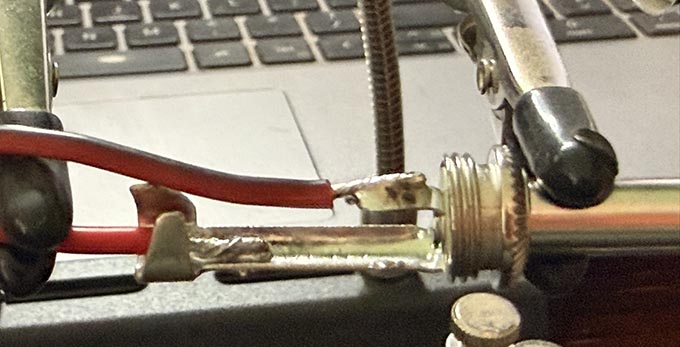
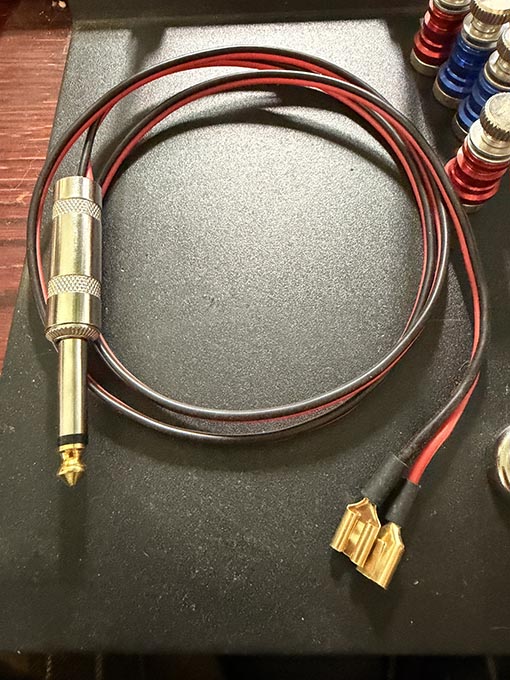
Once that was printed, the next step was to assemble the cable. I cut about 3 feet of 18 gauge red/black parallel wire, since it’s what I had handy. Really you could use just about anything here. There’s very little current being passed on the wire so the gauge shouldn’t matter too much. I used silicon insulated wire because I like it’s flexibility. But it does have a little bit of a drawback in this application that I’ll get to a little be later. First was to solder the wire onto the 1/4″ plug. Nothing special there.
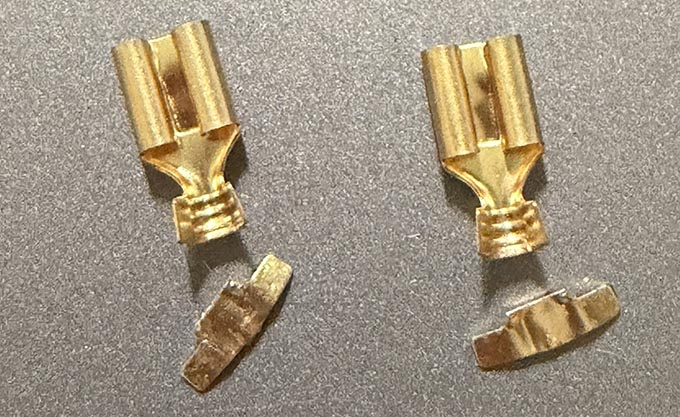
On the other end of the cable I needed to solder 2 female spade connectors, to go onto the rocker switch. But the spade connectors I had were a little long.
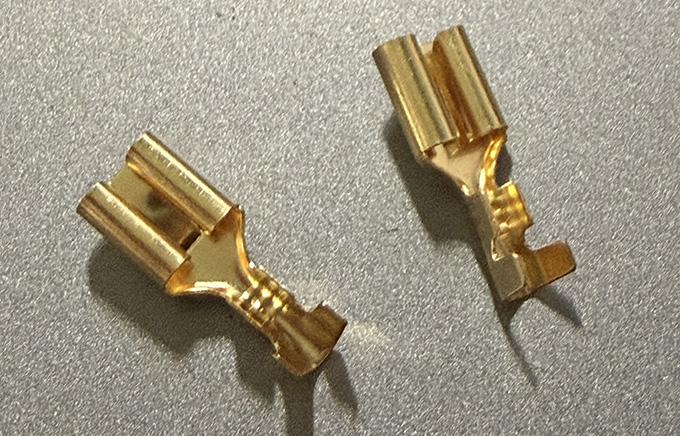
So I flattened and removed the bottom set of crimp connectors to shorten them up some. They were getting soldered anyway so the crimp flaps were not needed.
With those soldered on, the cable was finished.
Next was assembly. But even with the spade connectors shortened, it didn’t leave a lot of room in the case, and put a pretty sharp angle on the wires coming out of the switch. So I bent the switch terminals down a bit. That alleviated the sharp bend on the wires and made it all fit in the case.
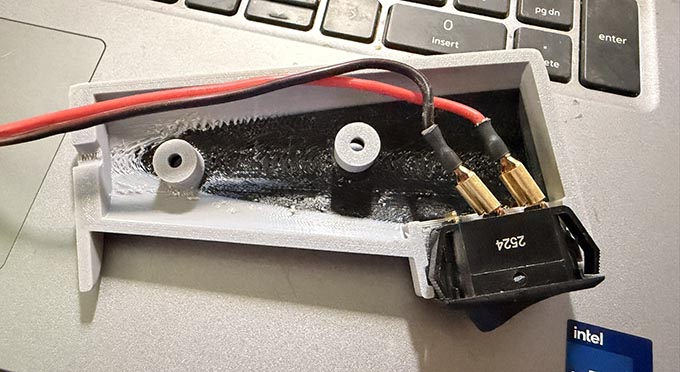
The only thing left was final assembly. The STL design does include M3 – 0.5 pitch screw threads in the design but they didn’t come out so great on my printer, so I did run a tap in there to make it a bit better. Final assembly is simple, lay the wire so it runs from the bottom hole, up past the screw posts, and out the front with just enough slack to attach the rocker switch. Screw the two halves together and pull the excess wire out the bottom while pushing the rocker switch into place until it clicks.
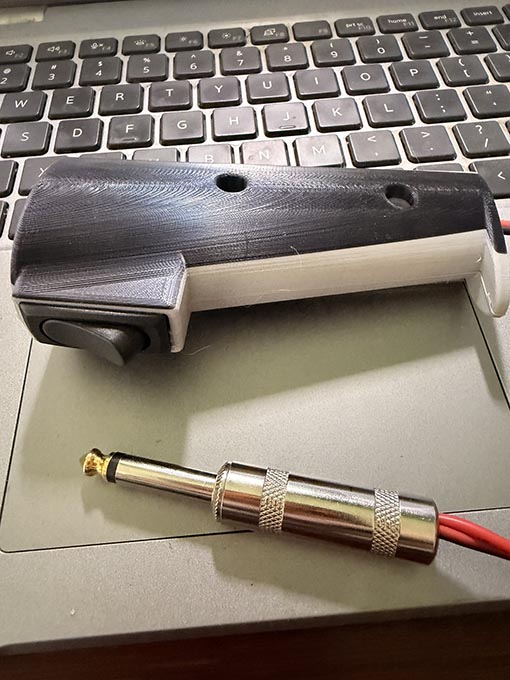
I ran out of grey filament while printing the final version and switched to black. Hence the 2-tone design. I think it looks good that way. What about you?
The only issue I have is that the silicone insulated wire doesn’t tie into a knot very easily. I was planning on putting a knot in it at the bottom of the case for strain relief, but I can’t get a small enough knot to fit in the case. So when I get around to it, I’m going to use a little bit of my wife’s hot glue to hold it in place at the bottom just to help with any strain I might put on it.
Now you might be asking what was the final cost? Well if we don’t count anything I already had on hand, then the cost was only the rocker switch and audio plug.
| Part | Quantity bought | Price as packaged | Price each |
|---|---|---|---|
| Rocker switch | 2 | $8.99 | $4.50 |
| 1/4″ Audio plug | 2 | $5.79 | $2.90 |
| total | $7.40 | ||
So the purchased price was just $7.40. Even if we add in the cost of filament and electricity (as reported by the slicer) which was $0.83 the whole thing comes to $8.23. That’s a whole lot better than $45 in my eyes! Plus it was a fun challenge and I would much rather build things than buy them.
Thanks for reading! If you have any comments or suggestions, please email me, or leave them in the comments below.
* As an Amazon Associate, I earn from qualifying purchases. Some links on this site may be affiliate links, which means I may earn a commission at no additional cost to you